At the top of the list of the most confounding household mysteries, along with lost socks and disappearing TV remotes, is how the tool we need always seems to be the only one missing from its drawer or chest. Whether a wrench is MIA or the screwdriver you want is buried under a bird’s nest of metal and plastic, it’s maddening to waste 30 minutes looking for a tool that you need for 30 seconds of work.

The issue always boils down to simple organization, but that’s a concept more easily identified than addressed. More often than we care to count, something breaks or needs to be fixed while we’re occupied with something else, so as soon as the problem is fixed, the tool gets thrown back into a drawer with a promise that we’ll put it back where it belongs when we have the time. The solution to this is to create a unique spot for each tool that makes finding and putting them away simple. The smartest, cheapest, and easiest way to do this is by creating your own foam insert tool chest liners, a DIY project that can save you time and headaches every time a job pops up.
Tool case liners are made out of layers of durable, custom-cut, closed-cell foam that gives each tool in your collection a home. Not only do these liners help organize stationary tool chests and save time, they can keep you from leaving a tool from your mobile toolbox at a job site. These inserts are incredibly easy to make at home, and require only a tape measure, foam sheets, adhesive, a sharp blade, and a marker. If you feel comfortable tracing a tool, cutting out shapes, and gluing two pieces of foam together, you can have a customized and organized tool case.
The first step to make your own tool chest insert is, of course, determining how much material you will need. Your craft foam sheets will need to snugly line the drawer end to end, so measure the interior dimensions of each space you want to organize. After figuring out how much foam you will need, you need to decide what kind of foam to use. Because of its moisture resistance, durability, and resilience, only closed-cell foams should be used for tool inserts. Foam Factory, Inc. stocks varieties that work well for tool case inserts, such as cross-linked polyethylene, polyethylene roll, and standard polyethylene.
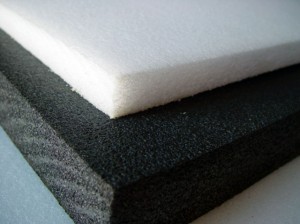
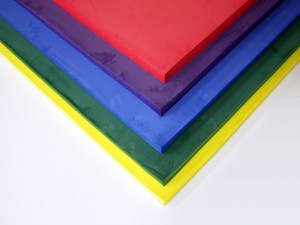
You will want to purchase two layers worth of foam; white or brightly colored foam for the bottom layer the tools will rest on, and a dark top layer which will house your tools. The reason for starkly contrasting layers is two-fold. The bright bottom layer makes it visually obvious when a tool is missing, a sort of safety check keeping you from forgetting to put a tool back and losing it. The dark top layer will maintain a cleaner aesthetic over time, as greasy or dirty tools get taken in and out. The bottom layer can be as thick or as thin as you want, but for security, the top sheet with cutouts should be deeper than the tools it will hold. Make sure the adhesive you purchase to bond the top and bottom layers is appropriate for the foam type you’ve selected as well, as different foams require different kinds of adhesive.
Once you have your materials, trim your foam sheets to the length and width of the tool drawer they will be placed in. Be sure not to under-cut the foam, since the sheets need to fit snugly against the drawers’ sides to keep the insert in place. The easiest way to trim the foam is on a flat surface like a cutting board or workbench, using a straightedge and a utility knife for clean cuts.
Once the sheets are trimmed to size, arrange the tools on what will be your top sheet of foam in a way that will make them easily located. Once you have the sheet filled, carefully trace along the outer edge of the tool with a permanent marker. Don’t worry about the marks made on the foam either, as this side will be glued against the bottom layer later.

Depending on the complexity and size of the tools being plotted out, a standard utility knife may not give you the control you need. If this is the case, precision hobby knives are perfect for the job. When you’re ready to cut, be sure to cut INSIDE of your markings. This is very important, as cutting within the trace lines ensures the foam will snugly hold the tool, keeping it from moving around. Depending on the depth of the foam or size of the tool, some people choose to add finger slots to make it easier to pull out a tool .
After cutting out the tool shapes and making sure they fit, it’s time to glue the top cutout sheet to the colored base layer. Spray adhesive is vital for a strong bond, but can be messier than a non-aerosol adhesive. For this reason, be sure your work surface is something you don’t mind getting dirty, or is covered with newspaper or a drop cloth. When the work surface is prepared, you will want the top cutout layer’s tracings facing you, which will hide the marks when the two layers are bonded. It’s also important to only spray the cutout layer and not the base because it gums up the spot where the tool rests.
Spray the cutout sheet evenly with adhesive, particularly around the edges of the cutouts so the two layers won’t pull apart when removing tools. After waiting a few seconds for the adhesive to get tacky, carefully place the colored base layer on top of the glue-covered top sheet. Apply pressure for a few seconds across the sheet, and allow a minute or two for the glue to bond and dry. At this point, you can put the insert into the drawer, and fill it with your newly organized tool collection!
Making your own liner inserts for your tools can save you the time and stress of looking all over for the right tool, and if it keeps you from losing a single tool, will have paid for themselves numerous times over.


How much would a 24″ x 10′ x 1″ sheet of XLPE sheet foam?
Please Contact Usregarding pricing for your request.