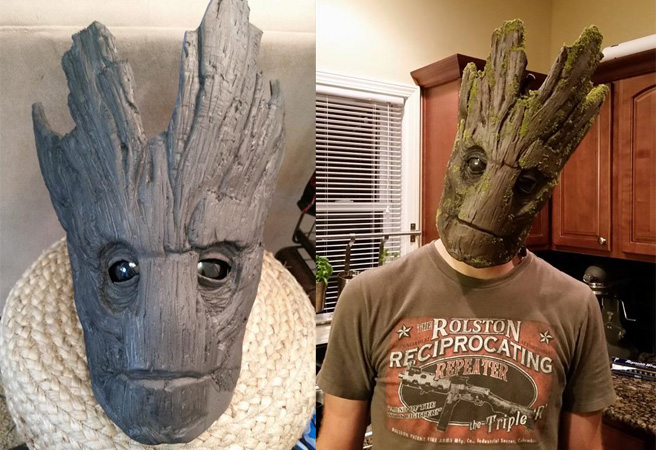
The world of cosplay is a great way to show your creative side and test your skills! Many characters you might choose to cosplay as require masks. You will likely need this element to complete your look. Having the right mask is crucial to the overall aesthetic of your costume!
Step 1. Gather Supplies
The first step to making a cosplay foam mask is gathering the right supplies for the task. You will need scissors, a sharp knife, spray paint, masking tape, foam adhesive spray, and Mod Podge. You will also need a foam that is soft enough to thermoform to the desired shape and is safe for skin contact. If you can’t find the foam in the desired color, you can paint the foam. You will also need items such as a mannequin wig head that you can get paint on, as well as a heat gun or hair dryer to help with thermoforming.
Step 2. Cut Out the Shape/Add Designs
If you are familiar with your cosplay character, you already know the basics of the mask you are trying to create. From Zorro to Batman, there are unique designs for every mask. You can easily do some practice sketches on tracing paper to perfect the overall outline of the mask before focusing on the foam. Once you have the right outline, you can draw it or trace it on the foam using a pencil, pen, or marker. Make sure you draw the outline on the inside of the mask to avoid any marks on the outside.
If you traced correctly, it should come out even and asymmetrical when you cut, but the trick is to cut out one side of the mask, fold it over, and use the first half as the outline for the second to ensure the most aligned result. You can also use this time to make any embellishments or carvings in the surface of the mask to match the character you are trying to create.

Step 3. Mold the Foam
The next step is to make sure the foam will fit when you wear it. Since most foam sheets are flat and straight, you will need to mold the foam to fit the contours of your face. This is where the masking tape and mannequin head come in to play. Place masking tape on the inside of the mask. Masking tape is best for this task because it will leave less noticeable damage on the mask when you are finished.
Once the foam mask is taped to the mannequin head, you can start the molding process using the heat gun or hair dryer. Start on a low heat setting and start in the middle of the mask working your way to the outer parts. The goal is to warm up the foam and mold it without melting the foam. If you smell a burning smell or the mask is melting, stop and evaluate the foam you are using, the heat being applied, or the distance between the foam and the heat source.
A good tip is to use your fingers to press the mask where you want it more molded. This will ensure an ideal stretch and mold, but be careful not to burn your fingers.
When you have the mask molded, leave it in place on the wig head to completely cool before moving to the next step in the process.
Step 4. Paint Foam If Desired
The next step in how to make a cosplay foam mask will depend on a few factors. If you are making a basic mask where color isn’t as important or the foam you chose is already in the color needed, then you will skip this step. If the mask isn’t the right color for your needs, you will need to paint the mask.
Leave the mask on the mannequin head and make sure you tape the back of the mask to the head for a secure fit. Masking tape is vulnerable to heat, so it may have loosened during the heating step. Use paint that is safe for the foam. Before painting the mask, test the paint on a scrap of the same foam to make sure it is safe. Since you are only painting the front of the mask, skin contact shouldn’t be a big deal.
Step 5. Seal the Mask
Once the paint is dry, seal the mask with Mod Podge while it is still on the wig head. The Mod Podge will give a shiny look to help seal in the paint and create a barrier to avoid skin irritation. It will also help the foam keep its shape. Most people apply multiple coats to their mask to get a better hold. If you are applying multiple coats, make sure each one dries all the way before adding another layer. You will want to leave the mask on the mannequin head for at least 24 hours before moving to the next step.
Step 6. Figure Out How You Will Wear It
Finally, figure out how you will wear the mask. The first option is to punch holes in the sides and use ribbon or string to tie it around your head. The second option is using “spirit gum”, which can be found in costume supply stores. This adhesive allows you to affix the mask directly to your face for an authentic look. If you go that route, make sure you buy the accompanying remover to help get it off your skin later. You should also test out the spirit gum in a small test area before applying it to your face to avoid any reaction.
Need the foam to get started? Check out our website for all of your foam needs and contact us today!


want to buy materials
Materials for your project can be purchased on our website, https://www.foambymail.com/.